
I became interested in leatherworking late last year. My nephew, L.J., was reading "My Side of the Mountain" and we were discussing the part of the book where the main character, Sam, made buckskin clothing. Very cool. I picked up some scrap leather at the hobby shop and got it into my head that I was going to make Luke a sheath for an axe and another for a saw I was going to give him. It was easy. I had waxed string that I picked up at a yard sale for a buck. I made my holes and went to work. I didn’t know how to sew, but I just did what made sense and it worked. Since then I’ve made a few game bags, bandoleers, axe sheaths, and shoes (miserable failure). Leatherworking is fun, fairly affordable and somewhat easy. My stuff doesn’t look that great. It’s pretty primitive in form. I could probably make it look better if I didn’t use the faux sinew, but it is easy to work with and durable. I think most people that make their own sheaths would sggest rivets over waxed string. I'd agree with that.
Anyway, here is the process of making the sheath for the 3 1/4 lb. Snow and Nealley head.
First, the tools. Left to right is a hole punch, scissors that I don't really care about, but are sharp enough to cut leather, and the role of waxed string.

I don't like leatherworking needles. I use a darning needle. It is sturdy with a big eye.

Then, choose your piece of leather. Pink leather never looks good on an axe head. Unless you're a chick.

Next, trace your outline. Make is slightly bigger than the head itself. When you sew the two pieces together, the head will need room to slide into the sheath. Giving it an extra inch for sewing helps with this. Ask me how I know.

Cut the leather.
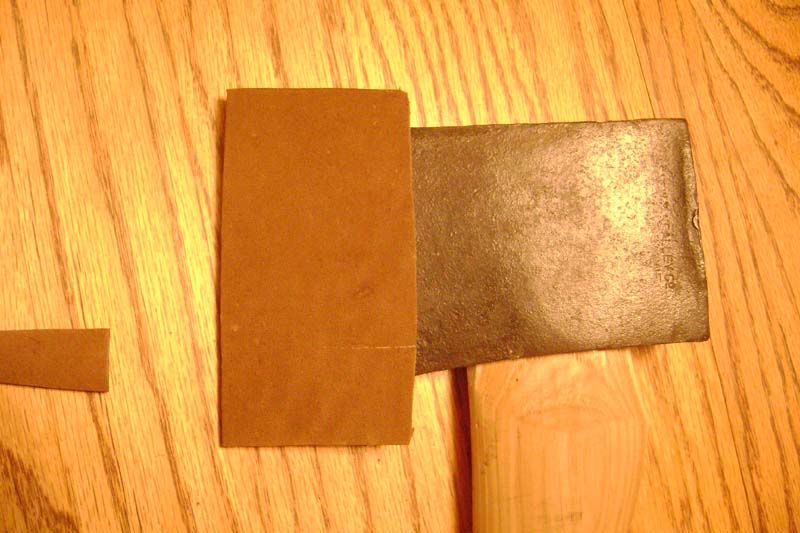
Match it up to the other side and repeat.

Punch holes in three sides of the leather. If you punch holes on the fourth side, you're a moron. Try to space the holes evenly. They sell a doohickey that'll do it for you, but I'm too cheap to spend the seven bucks on it.


After you punch all holes in one piece, hold the other piece up next to it. I mark the sides with a pen before punching the next batch of holes, so I know the two pieces will line up.

Commence sewing. I don't really know how to explain this part. Okay, I'll try. The rabbit (needle) goes down through hole one and back up through hole two. The rabbit then goes back down hole one and again out through hole two. The rabbit then moves onto hole three. Repeat.


And to think they don't teach Home Ec. anymore! Shame! I honestly think I may have been one of the last kids in America to have Home Ec. class. I looked hawt in a pink apron.
Try it out. See how it fits. If it doesn't fit, don't blame me. I get enough blame.

Next, cut yourself a piece for the strap. I'm using a snap on this one, but you don't have to. If you make the strap with a tiny bit of slack, you can just slide it up over the head.

I like to mark where the the strap is going to be sewn in, so it'll be even on both sides.

Sew it.

Next comes the snap. I bought a kit at Hobby Lobby that incldes what I'll call a hammer and an anvil. It basically allows you to put two pieces together and squish.


Give it a smack and you've got a snap!
Do the same for the receiving end of the snap inside the sheath pocket.

End result:

Add a little mink oil to keep the water off and presto, you have a sheath.

Any questions? Didn't think so. I think for my next post I'll either be reviewing a spokeshave or drying zucchinni. I don't know how to spell zuchini. Was that right? How about zookini? No.? Forget it. You know what I mean. Pax Domini sit semper vobiscum.
Mike, Oscar, Hotel.......OUT.
Looking good, Mike. Nice sheath. I made a sheath recently as well and also used waxed thread and a snap. Time will tell if I/we should have used rivets!
ReplyDeleteKeep the great posts coming!
bmatt
Know of any good sheath designs online? Mine are pretty basic. Would love to do some more advanced stuff!
ReplyDeleteMine are pretty simple, too! I usually just put "axe sheath" into Google Images and see what pops up. It's a good way to see lots of different designs.
ReplyDeletebmatt
I believe you would be better off just folding the piece of leather over so the edge is not up against the stitches. That way you wouldn't have as many stitches/holes to make. You could also add a welt between the edges or fold over a scrap of thick leather and put it in the sheath. If it gets cut just relace it. That way you won't have to re-stitch.
ReplyDeleteI think you're right. The way I've done it, the blade will come in contact with the string I used to sew it - and will probably cut it eventually. My issue is how do I make a sharp enough fold so it looks decent? Wet the leather? I might have to try it just to try it.
ReplyDeleteWhen I made a sheath for my Gränsfors, I used thick leather and, instead of using just the two side pieces sewn together, I made a spacer piece with exactly the same outline as the whole sheath, but cut to allow the axe to fit in the sheath. So if you look at the sheath from the edge, you can see that it is three layers thick. The edge of the axe rests against this spacer piece and comes nowhere near the waxed thread. This has worked very well so far.
ReplyDeletebmatt